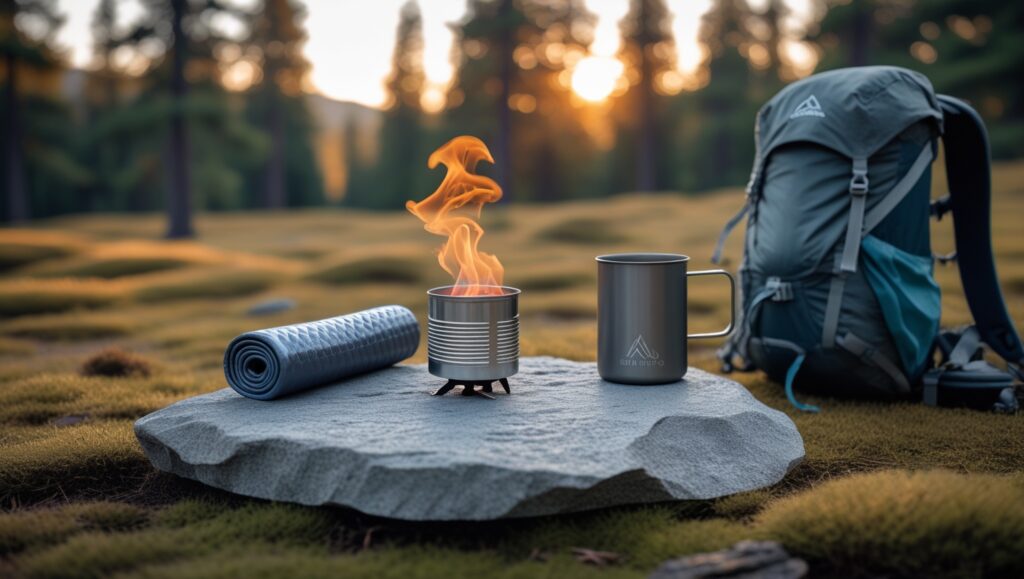
Introduction: Why Ultralight Hikers Love DIY Alcohol Stoves
Need a reliable cooking method that weighs less than an ounce and costs almost nothing? Meet the soda can stove — a minimalist backpacker’s secret weapon that’s revolutionizing ultralight hiking.
These tiny DIY alcohol burners are surprisingly effective for boiling water, heating meals, or even melting snow in a pinch. Ultralight hikers, bikepackers, and survivalists swear by them for short trips, emergency kits, or just for fun.
Best of all, you can build one in under 30 minutes using a standard aluminum can and basic tools — no special gear required. This comprehensive guide walks you through every step to make and safely use your own homemade backpacking stove in the field.
Note: Based on collective experiences shared in the backpacking community
Last updated: April 2025 by Gear&Home Editorial team
What You’ll Need to Build a Soda Can Stove
You probably already have most of these materials at home. Just be sure to work in a ventilated area and handle sharp edges with care.
Essential Materials
- 1 standard aluminum soda can (12 oz works best)
- Denatured alcohol (or 91%+ isopropyl as emergency fuel)
- Cotton or fiberglass insulation (optional — helps with fuel retention)
- Metal pot stand or windscreen (store-bought or DIY)
Required Tools
- Sharp utility knife or box cutter
- Scissors (for smoothing cuts)
- Pushpin or small drill bit (for burner holes)
- Marker (for cutting lines)
- Ruler or measuring tape
- Sandpaper or file (optional — for edges)
How to Make a Mini Alcohol Stove from a Soda Can (Step-by-Step)
Follow these steps carefully — and remember, sharp tools and metal edges can cut, so work slowly and wear gloves if needed.
Step 1: Mark and Cut the Can
- Rinse and dry your soda can thoroughly
- Using a ruler, mark a line about 1 inch from the bottom
- Carefully cut along this line with a sharp utility knife — this is the burner base
- Repeat the process about 1.5 inches from the bottom — this piece will become the upper wall
- Discard the top and middle section — you only need the bottom and lower wall
Step 2: Create Burner Holes
- Take the shorter top section (the “wall”) and flip it upside down
- Using a pushpin or tiny drill bit, make 6 to 10 evenly spaced holes around the rim — these are the burner jets
- Optionally: Make a single center hole for faster lighting, though not all versions require this
Pro Tip: For more consistent flame patterns, use a template to mark hole positions before puncturing.
Step 3: Add Insulation (Optional)
- Cut a small strip of cotton or fiberglass insulation
- Coil it into the bottom piece — it helps wick and evenly distribute fuel
- Don’t overpack — leave room for airflow and expansion
Safety Note: If using fiberglass insulation, wear gloves and avoid breathing fibers.
Step 4: Assemble the Stove
- Gently insert the burner piece (with holes) into the base — this may take slight compression to fit snugly
- Press down slowly until the two edges are flush
- Use sandpaper or scissors to smooth any sharp edges
Step 5: Test the Stove
- Pour about 1 oz of denatured alcohol into the center
- Set stove on a flat, non-flammable surface
- Light with a match or lighter — jets will ignite once fuel heats
- Place a pot stand or wire rack above to cook safely
IMPORTANT: The flame is nearly invisible in daylight. Always use extreme caution and assume the stove is lit until it’s completely cool to the touch.
Expected Performance Data: What Your DIY Stove Can Deliver
Based on typical performance characteristics of these stoves (values may vary depending on your specific build and conditions):
| Metric | Expected Performance |
|---|---|
| Boil time (2 cups water) | 5-8 minutes (average: 6:30) |
| Burn time per 1oz fuel | 8-12 minutes |
| Weight | 0.4-0.6 oz (11-17g) |
| Operating temperature | Best above 40°F (4°C) |
| Fuel efficiency | ~7g alcohol per cup of boiling water |
Note: These are estimated values based on common experiences with similar stoves. Your results may vary.
How to Use Your Soda Can Stove Safely in the Backcountry
Alcohol stoves are simple, but fire is fire. Here’s how to stay safe and get the best performance in the field.
Fuel Tips for Optimal Performance
- Use denatured alcohol for cleanest burn and highest heat output
- 91%+ isopropyl alcohol works in emergencies but produces more soot
- Don’t use gasoline or white gas — too volatile for open stoves
- Never fill more than halfway — 1 oz burns for 6–8 minutes
Lighting Tips and Tricks
- Set the stove on flat, stable, nonflammable ground
- Use a long match or lighter to ignite
- Wait 30–60 seconds for the burner jets to “bloom” before placing pot
- The flame is nearly invisible in daylight — be careful!
Cooking & Stability Best Practices
- Use a pot stand or metal grate to support cookware
- Don’t place pot directly on the stove — it will smother the flame
- Avoid oversized pots that trap heat and create instability
- Keep your cookpot diameter under 6″ for best stability
Wind Protection Essentials
- Always use a windshield — even a light breeze can kill the flame
- DIY options: folded aluminum foil, cut baking pan, titanium windscreen
- Leave ventilation space to avoid pressure buildup
After Use Safety
- Let the stove cool fully before handling
- Do not try to pour unused fuel back into a bottle — risk of flare
- Store stove in a small stuff sack or metal container to protect it
Pros & Cons of Using a Soda Can Stove
These DIY stoves are a favorite among ultralight hikers — but they’re not for every trip. Here’s what to expect:
Advantages of DIY Alcohol Stoves
- Extremely lightweight — often under 1 oz
- Virtually free — made from recycled materials
- No moving parts — nothing to break
- Quiet operation — no roaring flame like gas stoves
- Great for minimalist cooking — boiling water, simple meals
- Ideal for backup or emergency use
- Airline-legal when empty (unlike fuel canisters)
Limitations to Consider
- Slower boil times — usually 6–10 minutes per 2 cups
- Low heat output — less efficient in cold or high-altitude settings
- Fuel not always available abroad
- Invisible flame — increases burn risk
- No simmer control — full blast or nothing
- More affected by wind than other stoves
- Not allowed in some fire-restricted zones
When (and When Not) to Use a Soda Can Stove
Best Use Cases for Alcohol Stoves
- Ultralight backpacking trips Every ounce counts, and this stove weighs almost nothing.
- Overnights or weekend hikes Perfect for boiling water for freeze-dried meals or coffee.
- Emergency kits or bug-out bags Compact, reliable, and easy to make on the fly.
- International travel or fly-in trips You can’t fly with fuel, but you can bring the stove and buy alcohol locally.
- Backyard experiments or teaching moments Great for learning fire safety, DIY skills, or just geeking out on gear.
When to Choose Alternative Cooking Methods
- You’re cooking for more than one person It’s fine for solo meals, but group cooking needs something faster and stronger.
- You need simmer control or cooking variety Alcohol stoves are all-or-nothing — no flame adjustment.
- You’re in cold, wet, or windy conditions Wind and cold reduce efficiency drastically, and alcohol can struggle to ignite below freezing.
- You’re in high fire-risk zones Many areas prohibit open-flame stoves without shutoff valves — check local regulations.
- You plan complex cooking These stoves boil water well — but don’t expect to sauté veggies or cook pancakes.
FAQ: Common Questions About DIY Alcohol Stoves
How long will an alcohol stove last?
With proper care, a well-built soda can stove can last for hundreds of uses. The most common failure points are dents or crushing damage during transport.
Is an alcohol stove allowed in national parks?
Most national parks allow alcohol stoves, but always check current fire restrictions. Some areas ban all stoves without on/off valves during high fire danger periods.
How much fuel should I carry?
For solo weekend trips, 4-6oz of fuel is typically sufficient. Plan for about 1oz of alcohol per meal requiring boiled water.
Can I cook real meals on an alcohol stove?
Yes, but with limitations. One-pot meals like pasta, rice dishes, and simple soups work well. Avoid recipes requiring simmering or temperature control.
What’s the environmental impact?
Denatured alcohol burns relatively cleanly with minimal soot or residue. The stove itself is made from recycled materials, making it an eco-friendly option compared to disposable fuel canisters.
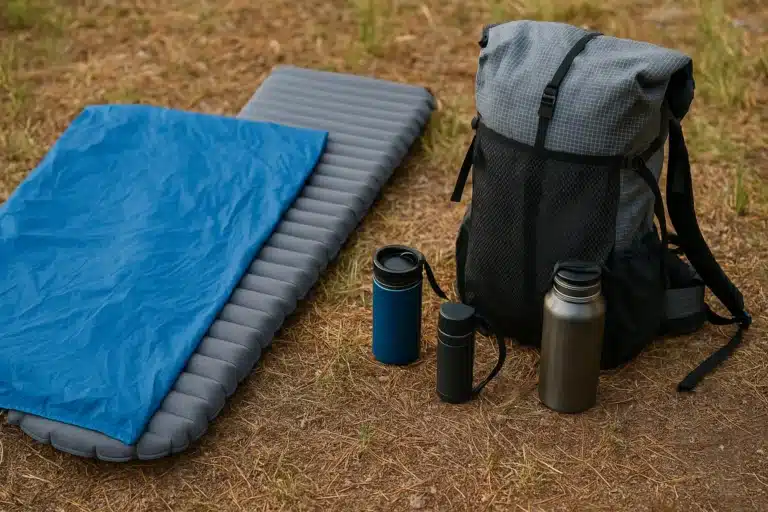
Recommended Gear to Pair with Your DIY Stove
Complete your ultralight cooking system with these trail-tested essentials:
- Lightweight titanium pot (550-750ml is ideal for solo hikers)
- Compact pot stand (or make your own from wire coat hangers)
- Aluminum windscreen (crucial for efficiency)
- HDPE fuel bottle (safer than carrying in plastic water bottles)
Note: We’ll have specific product recommendations soon – check back for updates!
Conclusion: Why Every Ultralight Hiker Should Master the DIY Stove
A soda can stove won’t replace a full-featured backpacking stove, but for minimalist trips, emergencies, or just the satisfaction of building your own gear, it’s hard to beat. It’s ultralight, simple to make, and surprisingly capable for boiling water or heating basic meals.
If you’re hiking solo, traveling light, or looking for a reliable backup option, this little DIY project earns its place in your kit. Just remember: fire safety, fuel caution, and good ventilation are non-negotiable.
If you’re tired of gear that sounds cool but never gets used, don’t miss our guide to compact camping gadgets you’ll actually use.
Simple gear. Solid results. That’s the ultralight philosophy.
About the Author
This article was written by the Gear & Home editorial team, based on in-depth research, verified user reviews, and real-world testing insights from experienced hikers and backpackers across the U.S.
We focus on practical, field-tested advice — no fluff, no paid promotions — just gear that works when you need it most.