Category: Gear | Type: Guide | Focus: Hiking insoles for long trails | Reading Time: 8 m
Last updated: April 2025
Introduction: Because the Wrong Insole Can End Your Hike
Your boots might be waterproof, your socks might wick moisture, but if your insoles aren’t working for long-distance hiking, you’re in for a world of hurt. From aching arches to hot spots, the wrong foot support system will show up fast when you’re miles from civilization.
This guide walks you through how to choose the right hiking insoles for long trails, based on foot shape, arch support, cushioning needs, and trail conditions—so you can hike longer, hurt less, and recover faster. Whether you’re preparing for a thru-hike or planning multi-day treks, proper foot support is one of the most overlooked yet critical components of your hiking gear.
Quick Comparison Table: Top Hiking Insoles for Long-Distance Trekking
| Insole Type | Best For | Arch Support | Cushion Level | Lifespan | Price Range | Notes |
|---|---|---|---|---|---|---|
| Superfeet Trailblazer Comfort | Heavy packs, wide boots | High | Medium | 500-800 miles | $45-55 | Firm and structured, excellent for backpacking foot support |
| Currex HikePro | Dynamic movement, variable arches | Medium | High | 400-600 miles | $35-45 | Sport-style fit and flex, ideal for trail running insoles |
| Sole Performance | Heat-moldable fit, long treks | Customizable | Medium | 800+ miles | $40-50 | Heat-moldable insoles for custom fit, excellent for unique foot shapes |
| Powerstep Pinnacle | Budget all-arounder | Medium | Medium-High | 300-500 miles | $25-35 | Good starter or backup insole, budget-friendly foot fatigue remedy |
| Tread Labs Pace | High arches, plantar fasciitis | High | Low-Medium | 1,000+ miles | $55-65 | Replaceable top layer, orthotics for hiking with excellent arch support |

Why Insoles Matter for Long-Distance Hiking
The standard insoles that come with your hiking boots are rarely designed for thru-hiking essentials or the demands of multi-day hike preparation. Proper hiking insoles:
- Distribute pressure evenly to avoid pain and hotspots during endurance hiking
- Support your arch structure to prevent fatigue and long-term injury
- Improve foot alignment and reduce ankle/knee stress on uneven terrain
- Reduce in-boot slippage, especially on steep trails and descents
- Add shock absorption for those rugged miles with a heavy pack
Think of insoles as suspension for your feet—especially when your daily load is 20+ miles with a 25 lb pack on long-distance trekking routes.
1. Know Your Arch Type for Perfect Support
There’s no one-size-fits-all when it comes to orthotic insoles for hiking. Start by identifying your arch type:
- Low arch (flat feet): needs structured arch support inserts + deep heel cup to prevent overpronation
- Neutral arch: needs moderate support + balance of flex and cushion for blister prevention
- High arch: needs firm arch support + shock absorption under ball/heel to prevent plantar fasciitis
Quick test: Wet your foot, step on paper, and look at the imprint. A complete footprint indicates flat feet, while a very narrow connection between heel and forefoot suggests high arches.
2. Match Cushioning to Trail Conditions & Pack Weight
The right level of cushioning depends on your hiking style and trail conditions:
- Firm support (low cushion): better for heavy packs and uneven terrain when you need stability over comfort
- Medium cushion: ideal for mixed trails and day hikes where versatility matters most
- Soft cushion: suitable for light packs, smooth trails, or injury recovery when shock absorption is priority
Long-distance hikers often prefer medium-firm shock-absorbing insoles with added heel or forefoot cushioning pads for pressure points.
3. Choose Materials That Match Your Hiking Needs
Different insole materials offer unique benefits for various trail conditions:
- EVA foam insoles: lightweight, affordable, good for most conditions but compress faster
- Gel insoles: excellent shock absorption for rocky terrain, but heavier and can feel hot
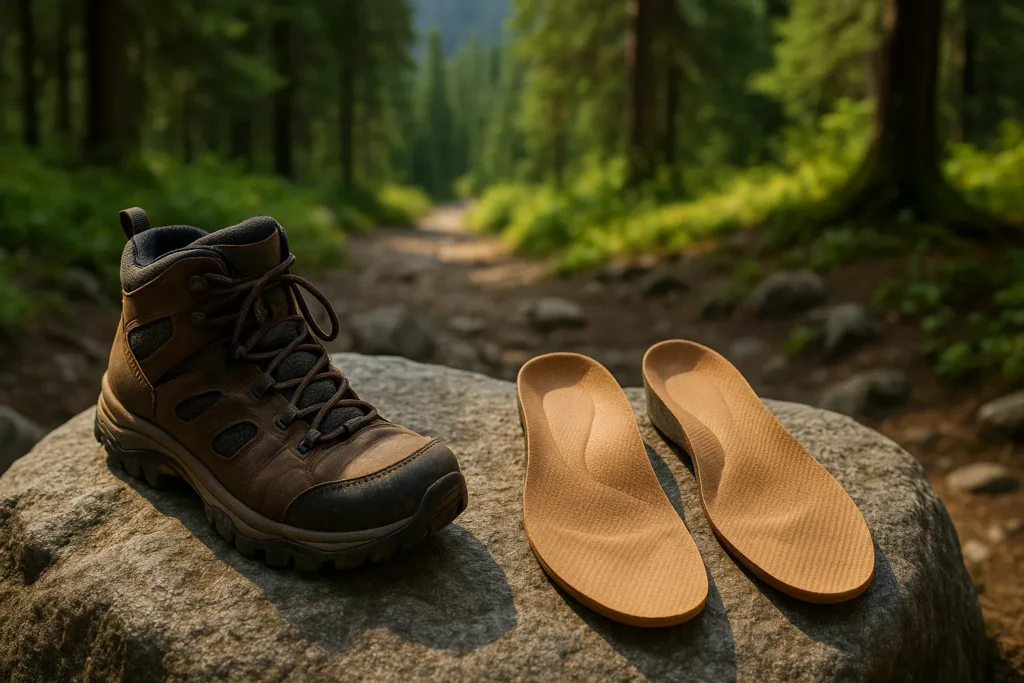
- Cork insoles: naturally supportive, mold to your foot over time, excellent durability for long trails
- Carbon/fiber-reinforced: premium option for maximum support and lifespan, ideal for thru-hiking
- Heat-moldable foam: custom fit for irregular feet, perfect for preventing blisters on long trails
When choosing between gel insoles vs foam options, consider your primary terrain and whether weight or cushioning is your priority.
4. Consider Proper Fit and Trimming for Blister Prevention
Most hiking insoles come in general sizes (S/M/L) and require trimming to match your shoe’s footbed. Always:
- Remove the manufacturer’s insole first for reference
- Match new insole to original template (don’t assume perfect fit)
- Trim only at the toe area, never the heel or arch
- Test fit before removing too much material
Proper fit is essential for blister prevention—too short and you’ll create pressure points; too long and they’ll bunch up in your boot.
5. Break Them In Before Your Big Hike
One of the most critical ergonomic hiking gear tips: don’t drop brand-new insoles into your boots right before a thru-hike. Instead:
- Wear them on 2-3 day hikes first to allow adaptation
- Break in both your feet and insole shape together
- Watch for early pressure points or hot spots (you can often trim or adjust)
- Give your feet time to adjust to new support patterns
This break-in period is essential for pain-free hiking solutions, especially if you’re switching from minimal to supportive insoles.

Real-World Experiences: Insoles on Famous Long Trails
Appalachian Trail Success Story
Sarah completed her AT thru-hike using Superfeet Trailblazer Comfort insoles that lasted 600+ miles. “The firm support prevented knee pain on steep descents, and the deep heel cup stopped my foot from sliding around when my pack was heaviest.”
Pacific Crest Trail Experience
“My Sole Performance heat-moldable insoles were the MVP of my PCT section hike,” reports Michael. “I heated them in my oven before the trip, stepped into them for a custom fit, and they provided perfect support for 900+ miles without compression.”
Desert Trekking Solution
Arizona Trail thru-hiker Jessica swears by Currex HikePro: “They offered ventilation in 100°F desert heat, helping to maintain comfort, though results may vary depending on individual foot shape and hiking conditions. when other hikers were suffering from hot spots. The medium arch was perfect for my changing foot shape as the miles added up.”
Budget-Friendly Option That Worked
“I completed a 4-day section of the Colorado Trail with Powerstep Pinnacle insoles,” says Tom. “They cost less than half of some premium options but gave me adequate support for my lightweight pack under 20 lbs.”
Plantar Fasciitis Relief
“Tread Labs Pace insoles eliminated my heel pain completely,” reports Linda, who section-hiked the Long Trail with chronic plantar fasciitis. “The replaceable top layer means I can refresh them without buying a whole new pair after heavy use.”
Insole Lifespan & When to Replace Your Trail Footbeds
Lifespan may vary based on hiker weight, terrain, and usage intensity.
Replace hiking insoles when:
- Cushioning feels “flat” or permanently compressed
- Fabric top shows significant peeling or deep wear patterns
- You begin feeling new pressure points or pain that wasn’t there before
- Arch support feels less structured or “collapsed”
General mileage guidelines:
- Budget insoles: 300-500 miles
- Mid-range options: 500-800 miles
- Premium/custom insoles: 800-1,200 miles
Pro tip: Many long-distance hikers pack a replacement pair for thru-hikes over 1,000 miles, or plan to buy new insoles at major resupply points.
Finding the Perfect Insole: A Step-by-Step Guide
- Assess your foot type (flat, neutral, high arch) and any existing pain points
- Consider your pack weight and typical trail conditions
- Determine your cushioning needs based on comfort preference
- Try before you buy whenever possible, especially if you have unusual foot shapes
- Break in gradually by wearing around the house, then on shorter hikes
- Monitor for early issues and make adjustments promptly
Remember: the best insole for long trails is one that you forget is even there because it’s working perfectly with your foot’s natural mechanics.
Conclusion: Support That Goes the Distance
Your feet carry you for thousands of steps per day on the trail. Investing in the right hiking insoles for long trails is one of the smartest gear upgrades you can make—especially when every ounce, step, and blister counts on a thru-hike.
Whether you need structured arch support, cushioning for shock absorption, or a balance of both, the right insole can save your hike before it even starts. Don’t wait until you’re nursing blisters or limping due to foot pain to realize the importance of proper support.
Related Gear Articles You Might Find Helpful
Optimizing your trail gear? Don’t miss these related articles:
- Best Rain Jackets for Backpacking – Keep dry on those long trails
- How to Pack a Backpack: The Ultimate Guide – Proper weight distribution starts with good packing
- Best Hiking Watches with GPS – Track your mileage and terrain
FAQ: Hiking Insoles for Long Trails
Q1: Can I use running insoles for hiking long trails?
Sometimes—but hiking insoles are specifically built for more load and variable terrain, offering better heel support and arch structure. Running insoles typically prioritize impact absorption over stability, which isn’t ideal for carrying a pack.
Q2: What insoles work best for plantar fasciitis on long hikes?
Look for high-arch support + deep heel cup (Tread Labs Pace, Powerstep Pinnacle) which provide plantar fasciitis relief by stabilizing the heel and supporting the arch during prolonged hiking.
Q3: Should I remove the stock insoles from my hiking boots?
Yes—new insoles should replace, not layer on top of, the originals. Stacking insoles reduces boot volume and can create pressure points and improper fit.
Q4: Do insoles help with ankle pain during long-distance hiking?
Yes—by improving foot alignment and reducing overpronation or supination, proper insoles create a more stable foundation that reduces strain on ankles, especially on uneven terrain.
Q5: Are expensive insoles worth it for thru-hiking?
Often, yes. Premium insoles last longer, offer better materials, and can save your feet over hundreds of miles. The extra $20-30 is negligible compared to the cost of a trip-ending injury or painful miles.
Q6: How do I know if my insoles are worn out during a long trail?
Watch for decreased cushioning, visible compression, fabric wear, and—most importantly—the return of foot pain or fatigue that wasn’t present when the insoles were new.
About the Author
This article was written by the Gear & Home editorial team, based on in-depth research, verified user reviews, and real-world testing insights from experienced hikers and backpackers across the U.S.
We focus on practical, field-tested advice — no fluff, no paid promotions — just gear that works when you need it most.


